Hey there, fellow project engineers, electricians, and facility managers — let’s cut to the chase for a sec. If you’ve ever stared at a boring, clunky trough cable tray install that looks like it was tossed up last minute, you know how much of an eyesore it can be. But here’s the thing: a cable tray isn’t just for holding wires. It’s part of the overall space, whether that’s a new commercial office, a sleek data center, or even a modern manufacturing floor. As a trough cable tray supplier, I’ve seen my fair share of installs that went right and ones that… well, let’s just say they make you want to look away. Today, I’m breaking down the real, actionable installation techniques that make trough cable tray look good — no fancy, overpriced tricks, just stuff that works (and looks sharp) for real projects. Trough Cable Tray

First off, let’s get one thing straight: beauty here doesn’t mean “looks like a work of art in a gallery.” It means clean, intentional, and integrated with the space, not sticking out like a sore thumb. The last thing anyone wants is a functional install that kills the vibe of a finished space. So where do you even start? Most people jump straight to picking the tray size, but the first beauty move is planning the layout before you even open the box of trough cable tray. I’ve had so many clients come to me mid-project because their install team ran the tray straight across a drop ceiling grid, clashing with HVAC vents or light fixtures. That’s avoidable. For example, when I worked with a local general contractor on a 20,000 sq ft tech office last year, we mapped the tray path alongside structural beams instead of fighting them. We even held off on ordering extra 90-degree elbows until we confirmed the exact distances between ceiling joists — no awkward, forced bends that look messy. The key here is using BIM software to map the tray layout early, but if you’re not doing BIM, grab a measuring tape, a laser level, and mark every obstacle first. Simple planning = way less ugly mistakes later.
Next up, picking the right supports — and placing them correctly. I know, supports are just there to hold the tray up, right? Wrong. Bad support placement is one of the top culprits for a messy tray install. Too many people space supports way too far apart, causing the tray to sag, which makes the whole line look uneven. Or they mount supports at weird angles, so the tray looks like it’s leaning instead of running straight. As a supplier, I always tell clients: follow the manufacturer’s support spacing guidelines, but tweak them for aesthetics too. For horizontal runs, don’t space supports more than 5 feet apart for standard steel tray — that prevents sag and keeps the tray line crisp. For vertical runs, use adjustable clamps that let you align the tray flush with the wall, so there’s no gap or uneven edge. We had a customer on a retail fit-out last month that wanted the tray hidden as much as possible in their back-of-house, so we used wall-mount cantilever supports set 4 feet apart, spaced exactly with the same gap as their shelving units. It looked intentional, not like an afterthought. Another quick win: use matching finish supports. If you’re using pre-painted white tray, don’t grab cheap metal supports that are raw steel — paint them the same color, or get powder-coated supports from your supplier. A small detail, but it makes the whole install look cohesive.
Now, let’s talk about the connections between trough cable tray sections. This is where most installs go from “okay” to “ugly real fast.” Using the wrong connectors, or forcing sections together, creates gaps, misaligned edges, or even protruding bolts that catch on your hand when you walk by. The fix? Use the correct slip-on or bolted connectors designed specifically for your tray size. For example, our standard 6-inch trough tray uses 2-foot slip joints — slide the ends together, tighten the side screws, and you get a seamless look instead of a lumpy seam. Pro tip: when connecting sections, make sure the edges are perfectly flush. If one section is even 1/8 inch off, it will look like a step, and that’s noticeable. We once had an electrician tell us he hated bolted connections because they take longer, but we showed him our new “quick-lok” bolt kits that align the edges automatically — he cut his install time on a hospital project by 20% and the tray looked like one solid piece, not multiple sections. Also, don’t over-tighten bolts — that can warp the tray edge, leaving a gap you didn’t plan for. Tighten until the connector is snug, and call it a day.
Bends are another big pain point for looks. Whether it’s a 90-degree corner, a tee, or a reduction in tray size, bad bends stand out like a sore thumb. Here’s the rule: use pre-fabricated bends whenever possible, not field-bent ones. I get it, field-bending a tray on-site seems cheaper or faster, but unless you have the right tools (a hydraulic pipe bender specifically for metal tray) and experience, you’ll end up with a kink, uneven curve, or sharp edge that looks sketchy. Pre-fabricated bends are precision-cut, so they align perfectly with your straight sections, no surprises. On a recent data center project, we ran a tray line that made three 90-degree turns to wrap around a server rack bank — all pre-fabricated, so every joint lined up exactly, and the curve was smooth instead of crinkly. If you have to do a field bend for a custom spot, use a deburring tool to smooth the edges afterward, and wipe the tray down to get rid of any metal shavings. It’s a small step, but it makes the bend look professional.
Color and finish matter more than you think, too. A lot of people just go with bare steel tray because it’s cheap, but that’s a mistake if you want it to look good. If the tray is going to be visible — like in a common area, or under a ceiling where you can see it — pick a finish that complements the space. For white office spaces, a powder-coated white or light gray tray blends in instead of standing out. For industrial spaces with dark walls, a black or galvanized steel (wait, galvanized has a nice silver finish that’s not overly shiny) works. And don’t forget about custom painting if your space has a specific brand color — we’ve had clients paint their trough tray a company’s accent blue for a new corporate HQ, and it looks like it was designed with the space, not just added on. Also, avoid shiny finishes if you’re installing in an area with a lot of glare — a matte powder coat will look much cleaner than a gloss that reflects overhead lights. One thing to note: make sure the finish is compatible with your cable type. For example, if you’re running low-voltage data cables, a non-conductive powder coat is fine, but if you need electrical conductivity for power cables, go with a galvanized or bare steel tray — we can help you pick the right finish based on your project needs, no guesswork.
Finally, don’t forget about cable management. This is the part that ties everything together. A beautiful tray is useless if cables are sticking out, tangled, or hanging over the edge. Use cable ties that match the tray color — black ties on black tray, white ties on white tray — so they blend in, instead of bright red or blue ties that scream for attention. And don’t overstuff the tray. Most people fill the tray to 100% capacity, which makes it bulge, sag, and looks messy. Leave at least 30% of the tray empty for future cables, so the tray stays neat and the cables don’t bunch up. We had a client on a co-working space last year that thought stuffing every inch of the tray would save money, but after a year, they had to add new cables and had to cut existing ones to fit — plus, the tray was bulging so much it looked like it was going to fall. Now, they only fill the tray to 70% capacity, and it looks clean even with three different cable types (power, data, lighting) running through it. Another tip: use cable clamps to secure larger cables so they don’t sag down in the tray. Small detail, but it keeps the whole line straight.
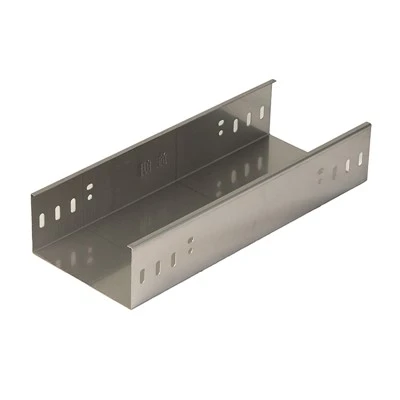
At the end of the day, making trough cable tray more beautiful isn’t about overcomplicating things. It’s about planning early, paying attention to small details (supports, connections, finishes), and not cutting corners on parts that affect both look and function. As a trough cable tray supplier, I’ve seen firsthand that a good-looking install doesn’t cost way more — it just takes a little extra care and intention. If you’re working on a project and want to talk about which techniques would work best for your space, or need advice on tray sizes, finishes, or connectors, hit me up. I’m here to help, whether you’re a small electrician on a local café or a project manager on a large commercial build. Before I sign off, a quick note: always follow your local electrical codes for tray installation — beauty is great, but safety comes first.
Light Duty Cable Tray References
- Electrical Construction Maintenance. (2022). Trough Cable Tray Installation Best Practices for Aesthetic and Functional Compliance. Retrieved from industry technical journals
- National Fire Protection Association. (2020). NFPA 70: National Electrical Code Article 390 – Cable Tray Systems. (General electrical safety guidelines applicable to all tray installations)
- Powder Coating Institute. (2021). Finishing Solutions for Metal Cable Tray: A Guide to Color, Durability, and Aesthetics. Retrieved from industry trade resources
Hebei Jinglang Industrial Co., Ltd.
As one of the most professional trough cable tray manufacturers and suppliers in China, we also support customized service. We warmly welcome you to wholesale high quality trough cable tray in stock here from our factory. If you have any enquiry about quotation, please feel free to email us.
Address: Nanxinzhuang Village, Daweihe Hui and Manchu Township, Wen’an County, Langfang City, Hebei Province
E-mail: 18231629992@163.com
WebSite: https://www.jinglangcabletray.com/
